Friday, October 12, 2012

On The Board - Rustic Cabin Look

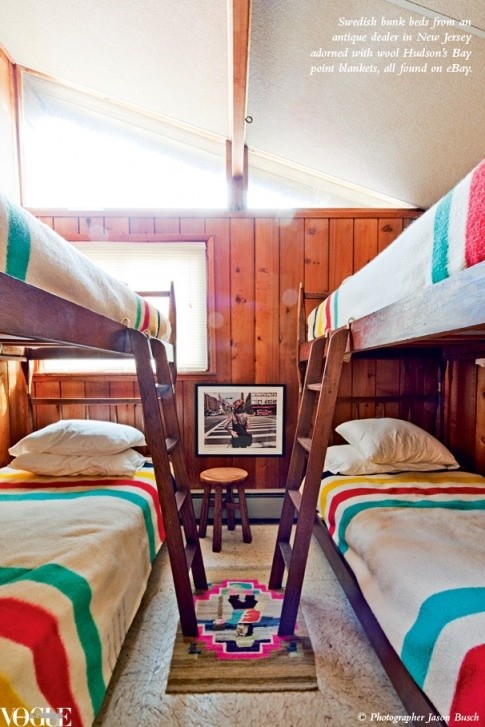
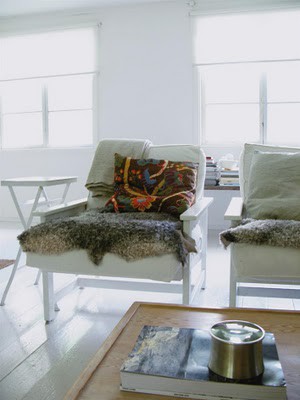
Funny, when I think of cabins or cottages, Winter and cozy come to mind.  Could just be the mindset I'm in now, but I have always loved the feeling of nesting down into the home this time of year and here's a few ideas I had for incorporating that look and feel of a warm, cozy rustic cabin.  Bits and pieces throughout your home, can help you achieve that feeling~take a look!


Where to find:

How do you make your home cozy for the Winter?
Happy Friday♥

Wednesday, October 10, 2012

Going Swiss-This One's Easy Part 2

Remember my post on the easy bathroom shelving here?  I decided to add a little something to the monochromatic scheme without going too bold.  With Winter soon approaching, I am incorporating little touches here and there throughout the house, including in all the bathrooms.  I've always loved the Swiss Army blanket & this design is so easy to add to anything, including these baskets...

Before

After

All that was used was Krylon "Banner Red" & white spray paint.  So easy!  It's amazing what a bit of paint can do to a room or accessories.  

More projects on the go, so stay tuned for more:)

Sunday, October 7, 2012

The Power Of Great Bones In A Room

Today I'de like to share with you a recent e-Design I did for a family in Florida.  My client was looking for something light, airy, comfortable and simple.  Think Pottery Barn.  She loves light blues and aqua's, but changing the wall colour was not an option.  However, painting out the entire bottom panelling all white was.  The room had amazing bones and architecture already and we had to keep the chandelier, dining table & chairs.  

The key with keeping things monochromatic is incorporating textures and layers and adding a few pops of colour in the accessories.  The client already had a few great pieces like a beautiful rug at the entry way in a grey/blue geometric and a beautiful chair in the office to take the inspiration from.  


With the dining room being visible from two separate openings, everything had to flow.  

Dining room view from entry way:
You can see the great bones of this room stand out, like the panelling and the curved openings to the room

view from office area/second opening into dining room:
Big beautiful window 

Here is what I came up with for her $1,000 budget:

The final look was right on target with what she wanted and I couldn't be happier!  She will add her own photographs in the room for that personal touch I always encourage clients to incorporate.  It just goes to show you when you have good bones in a room to start with, great design happens.  In the end, it actually ended up about $350 under budget which is even better! 

Where to buy:  

10. Dinnerware 


Thank you Melanie for inviting me into your  beautiful home!  
For more information on my e-Design services click here.

Tuesday, September 25, 2012

This One's Easy-DIY Bathroom Shelves

Thankfully I have my own bathroom, but sharing one isn't fun at the best of times, especially when it's a teenager and a tween and it's a small bathroom to boot.  So coming up with more storage was the main issue in there, one that I never heard the end of.  It's a very typical upstairs bathroom.  Combination tub/shower, one cabinet with a sink, no drawers, and very little storage under the sink to store extra towels, bathroom tissue AND of course, both their toiletries.  Because I had been hearing about this storage issue for so long, and with really no room for a vertical standing cabinet or anything similar, that could HIDE their stuff I had to think pretty quickly but come up with something smart.  

Well I'm definitely all about recycling, and had some left over Spruce plywood from another project I had worked on, stain, and screws.  The only thing missing were the brackets and baskets!  Found the brackets for $1.97ea, spray painted them with Krylon Oil-Rubbed Bronze (because the white just wasn't doing it for me), stained the wood a dark walnut and then applied a quick drying coat of sealant, and found 4 baskets for $3.99ea that were the perfect width and height.  Within the weekend this was done and it is working like a charm-better yet, it's suddenly quieter:)

Here's the before:

And after:

They now have a shelf dedicated to themselves as well as a place for their toothbrush (old jam jar I painted), & some extra toiletry needs in jars (yay...already had!), under the shelves.  Oh and they still have a bit of room under the sink.  It all worked out pretty nifty!

Ever had a project that needed to be done on the fly?  Love to hear!

Friday, September 14, 2012

Painting Stripes

I was a bit nervous to paint stripes, just that ol' sinking feeling kept creeping in, that the paint would bleed to death and look like crap in the end, but at the same time, was pretty stoked to do it.  Of course I had a little bit of a hiccup, but that was quickly put to rest knowing I could cover it up.  Oh, I'm definitely not suggesting you cover up your mistakes, but hey, s@#!t happens and it just worked out this time, that my project allowed me to do that:)  This is pretty straight forward, and I know many of you have painted stripes, so this is just a quick recap of how it all went down!

The before:


I painted the entire wall with the white first, let it sit over night, then taped out where the stripes would go 8" apart.  I prefer to use the green Frog Tape, for most of my painting projects, but that's just my preference.  Then I applied the brown Martha Stewart colour, starting at the top.  After finishing the stripes, I started to remove the tape row by row...


...aaaaand oops!


but luckily...


...the headboard covered it!  Hooray!  I might actually attempt to do stripes again in the next year, (or 10)...:)

Paint:
Martha Stewart Molasses (MSL245)
Low Odor/Low VOC Colour Performance Paint

Beauti-Tone Signature Series
White-700-00W
Low VOC

(Both in Eggshell). 

Thursday, September 13, 2012

Bedroom Makeover Part 2-DIY Headboard

If you have been following along, (http://refreshint.blogspot.ca/2012/09/bedroom-makeover-part-1.html), 
I made over my daughter's bedroom and promised a few tutorials.  Here is one easy headboard project anyone can do!  I choose to do it in a white waffle weave cotton against a striped wall.  Depending on how many panels you choose to make, (I chose to do 15-as my daughter wished), but you can do the full 25 to the ceiling!  It can be time consuming, but the end result is pretty amazing and so worth it! 

Step by step instructions:

Step 1. Start by cutting out your fabric squares 16" x 16" and foam pieces 12"x 12".  I found using a utility knife did the trick quite well for cutting my foam, as long as you have a new sharp blade.  Half way through, I switched to a new blade.  

Step 2. Put the foam square on top of your 12" x 12" wood panel.   

Step 3. Then take your fabric square, and center it over your foam and wood.  

Step 4. Top view-all lined up

Step 5. Then flip over the whole thing and make sure you have an even amount of fabric on all sides.  

Step 6. Ready to attach the fabric with the staple gun. 

Step 7. I start with one staple at the top center and then again on the bottom center.  

Step 8. Repeat with each side in the center. 

Step 9. Cut each corner in a V shape to cut off access fabric.  This will help eliminate bulk on your panels.  

Step 10. Then fold over the corners like a nurses fold and staple in place.  See-no bulk!

Flip over your finished panel and now just 14 more to go!

Half way done!

Sneak Peek:)  

AND...finished!  

The whole inspiration came from the HGTV Green Home 2012 Master bedroom.  You can see why!  We added a spin on it to my daughter's liking and it turned out fabulous!  From this point on, more cushions were added, more layering on the bed, new nightstands, lamps and accessories were added.  So stayed tuned for more!  

For a list of supplies needed for this project & instructions on to how to assemble & hang the headboard panels on the wall go here:

HGTV Green Home 2012 Headboard Project

Stay tuned for Part 3-Bedskirt tutorial to follow!
Thanks for popping by!

Wednesday, September 12, 2012

To Paint or Not To Paint?

So I got myself some new (to me) chairs-6 to be exact-which I wanted, (actually it was 8), but that my friends is hard to find, especially ones you like & if you're on a budget like me.  I searched high and low for the right style, shape, height & comfort level in a set and finally found them for a STEAL!  I find Craigslist can either be your worst enemy or your best friend and luckily this time, we're pals.  Here's a pic of the chairs:


Now the question is, should I paint them or not?  There are so many options with these that I had to put together an idea board so I could narrow it down, but the possibilities are almost endless AND I happen to like them all which does NOT help!  See what I mean?

I realize I have more upholstery on mine, and they are not Chinese Chippendale Chairs, but you get the idea.  I had every intention of painting them, so why am I so indecisive now?  Do I like the natural look?  Not sure.  I want the bistro look, but I'm certainly not afraid of colour, so that is an option.  I am definitely changing the upholstery, because well let's face it...it's seen better days and really isn't my style anyway.  What is my style you ask?  For those that know me, you guessed right-call it what you like-rustic, eclectic, scandinavian, with a bit of industrial.  Phew!  Is this even a style?  Well it's mine, but I need a bit of advice now, so I am reaching out to you, my fellow bloggers, readers and friends alike...what do you think I should do?  Paint?  If so, what colour?  No paint?  Upholstery suggestions?  Geometric, stripes, one colour, two colours?  ACK!  My walls are white, dining table is a MCM darker teak. HELP!


Related Posts Plugin for WordPress, Blogger...