Wednesday, September 12, 2012

To Paint or Not To Paint?

So I got myself some new (to me) chairs-6 to be exact-which I wanted, (actually it was 8), but that my friends is hard to find, especially ones you like & if you're on a budget like me.  I searched high and low for the right style, shape, height & comfort level in a set and finally found them for a STEAL!  I find Craigslist can either be your worst enemy or your best friend and luckily this time, we're pals.  Here's a pic of the chairs:


Now the question is, should I paint them or not?  There are so many options with these that I had to put together an idea board so I could narrow it down, but the possibilities are almost endless AND I happen to like them all which does NOT help!  See what I mean?

I realize I have more upholstery on mine, and they are not Chinese Chippendale Chairs, but you get the idea.  I had every intention of painting them, so why am I so indecisive now?  Do I like the natural look?  Not sure.  I want the bistro look, but I'm certainly not afraid of colour, so that is an option.  I am definitely changing the upholstery, because well let's face it...it's seen better days and really isn't my style anyway.  What is my style you ask?  For those that know me, you guessed right-call it what you like-rustic, eclectic, scandinavian, with a bit of industrial.  Phew!  Is this even a style?  Well it's mine, but I need a bit of advice now, so I am reaching out to you, my fellow bloggers, readers and friends alike...what do you think I should do?  Paint?  If so, what colour?  No paint?  Upholstery suggestions?  Geometric, stripes, one colour, two colours?  ACK!  My walls are white, dining table is a MCM darker teak. HELP!


Monday, September 10, 2012

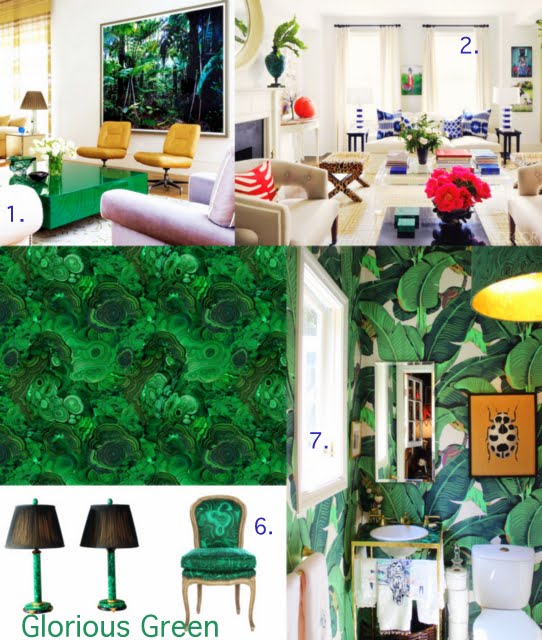
On The Board-Malachite

Green, green, glorious green.  In particular, deep green or Malachite.  I have seen it paired with red, deep blue and even with a white background (gotta have in my home), and I must say it IS pretty glorious.  What's your take on the jewel tones in the home or in fashion?  Would you embrace it or ditch it?  To me it even adds that organic feel, which I love.  Here's a board I put together with what I think you're going to see a lot more of.  


Are you ready for Malachite?

Sunday, September 9, 2012

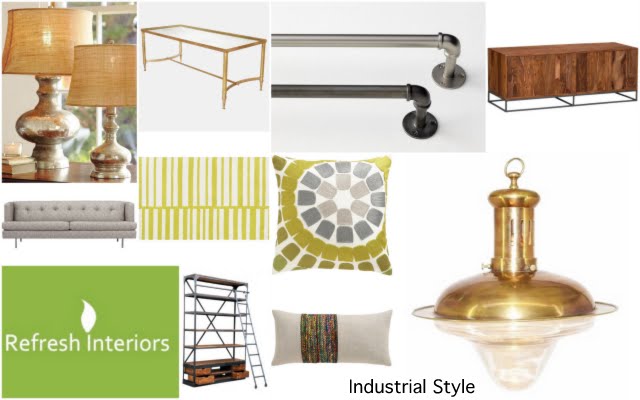
On The Board~Industrial Style

When you think of Industrial Style, hard surfaces usually come to mind;  concrete, metals, brick & exposed beams.  Adding the right lighting, as well as some softer elements keeps it cozy and adds some warmth, especially now that Fall is upon us.  So don't be afraid to add a few pillows and soft fur throws or rugs.  I've created a mood board that I think represents Industrial Style...I love mixing metals, adding a bit of colour & keeping accessories to a minimum.  


e-Design Services Now Available!

Refresh Interiors now offers e-Design services.  For those of you that I can't reach personally or are out of area, this is the ideal service for you!  After filling out a questionnaire and sending in your pictures, it's an affordable way to have your own personal decorator and stylist right in your home/office space.  This service includes:


  • a personalized concept/mood board
  • detailed furniture selection 
  • specific fabric, wallpaper, paint, flooring & hardware recommendations & selections
  • detailed list of shopping resources, online and retail locations in your specific area
  • A comprehensive list of how to pull it all together
Here is an example of a back to school/home-office board:


e-Design Service Fee is $150 for any room.  

To get started on your personalized room makeover, please contact me at refreshinterior@gmail.com for more information and for the questionnaire.


Wednesday, September 5, 2012

Bedroom Makeover-Part 1

Over the past little while I have been occupying myself with some long overdue projects...and I mean LONG overdue.  Some others have been put on hold for now, but that's OK.  Rome wasn't built in a day right?  Let's just say it took awhile, simply due to the fact that colour schemes and ideas were changed many times over.  You have to understand, when you are doing a room for the younger generation, it's really important to have THEIR input in what they (my daughter in this case), want the room to look like.   The FINAL inspiration came from the master bedroom in the HGTV 2012 Green Home.  It had the colours she loved, as well as a beachy, casual style & feel that is completely her.  It's a room that can grow with her and doesn't feel too old.  Together, with a 'teensy' bit of my expertise and help, we pulled it all together.  
Inspiration 

The size of my daughter's room is obviously no where near the size of the inspiration room, so some tweaking to make it HER own and the way she wanted it was necessary.  For starters, she decided she wanted a white headboard and bedskirt, not brown.  I fully agreed.  I made the bedskirt from the same white waffle fabric as the headboard, so the colour could come in the form of the throws, pillows and furniture if she so desired.  That way it's easy to change the colour if she ever gets tired of these ones.  Makes sense right?  

White Waffle Fabric

I know I should have done a better tutorial on the bedskirt and thought about it after the fact,  but did put together a small one (to follow).  The end result has a clean, fresh look.  All the white waffle fabric that I used to make the bedskirt and headboard I ended up getting for free from my mother who had bought it like 5 years ago to make robes!  What would we do without them and the best part was how I could reuse it! 

So it turns out, I can actually do stripes...except well, for one little hiccup:(  Don't even know how that happened!  Luckily the DIY headboard project covered over it so I was VERY relieved! Oh and the paint, was on sale at Home Depot for a mere $12!  This project was really done on a dime and YES!  It CAN be done! 

Stripes done in Martha Stewart Molasses (MSL245)
Low Odor/Low VOC Colour Performance Paint

Here's a sneak peek at the headboard that covers that not so lovely spot

THANK GOODNESS!

She decided she only wanted 3 rows of the headboard so more of the stripes would show.  Less work and fine with me:)

The whole colour scheme was done in a fresh green, (remember the pillows I made a while back?)...

SOFIA Fabric IKEA $6.99/yd! (It's now $7.99/yd..lol!)

...as well as turquoise/teal as seen in the flecks in this throw.
GURLI Throw from IKEA $14.99

Of course white, and brown are the backdrop colours as seen in the walls and included in the bedding as well.  There were so many things to do in this makeover, like window treatment, lighting & furniture/storage solutions, but it was so worth it.  Natural materials, like natural wood, wicker and rattan were also used.  It continues to amaze me what a transformation can do! I have to say it's the reaction at the end of it all that makes me love what I do:) Especially when it's for your own family!

Stay tuned for a few of the DIY tutorials to follow and I'de love to hear what you think about it so far!  
Thanks for popping by!

Tuesday, September 4, 2012

Rental Decorating-Living In Style!


Just because you live in a rental, doesn't mean you can't live comfortably and stylish.  It's easy to inject your own style into any space and still be able to take some of that with you to your next digs, even if you don't own the property.  Of course before you decide to go into a decorating frenzy, be sure to check with your landlord on any changes you would like to make.  Depending on the changes and decorating you would like to incorporate, you may even be able to negotiate a little on the rent and/or get the cost of the materials covered if you're willing to do the work when it comes to the painting, changing out a countertop, cupboards, fixtures or flooring.  Here are just some of the ways that you can add your flare to the rental space without comprising your budget and making it feel like home. 

The best way to get the most bang for your buck is with paint. A fresh coat of paint will instantly give you that new feeling and brighten up any space.  It's best to stick with warm, neutral colours so when it comes time to move there will be less work trying to cover any bold coloured walls which won't be good for the bank account.  Keep the bold colours to the accents, art and furniture pieces. 


Lighting is key in any space depending on the room and it's purpose.  Change out any outdated wall sconces, overhead lighting or hanging pendants with new ones.  This is usually very easy and inexpensive and the best part is you can take it with you to your new place.  Just be sure to hang on to the older lighting to put back in it's original place when it's time to move.

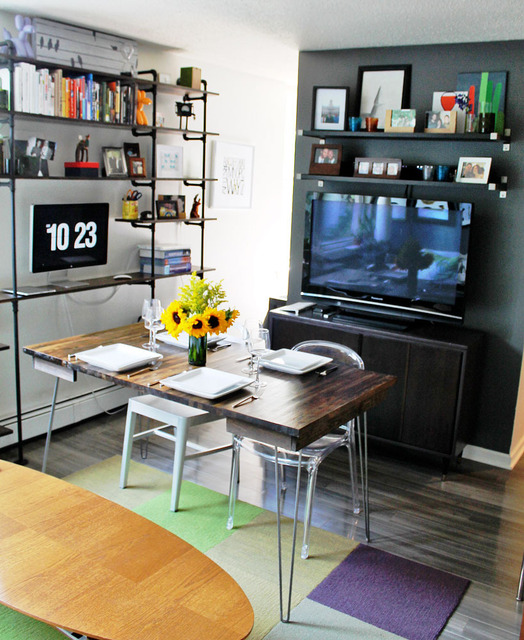
Multifunctional pieces are a wonderful way to incorporate different purposes for a room.  If you don't have a lot of space and are on a budget like most renters, these pieces are a must.  Try finding a coffee table that could also be used as a dining table simply by finding one with folding legs or changing them to hydrolic.  You can also replace the top so it can fold down on either side when you're using it for your coffee table.  Also try adding more seating to your space by adding a bench with cushions that can also be moved for more seating at the dining table.  Then when it's time to move, either of these pieces can be used again in other parts of your new home for different purposes. 

desk/office area

same desk as dining table

Window treatments will most likely be necessary.  To mask any deficiencies or low ceilings, hang draperies from floor to ceiling to make the space feel larger.  Then you can pack them up when you leave!


Most renters don't have the budget for adding built-ins, not to mention you can't take it with you to your next home.  Adding prefabricated storage units from big box stores that can be brought with you and placed in almost any room, will give you more storage without the added cost of the built-in custom look. You can always go up so think vertically!


Contact us today for help decorating your rental.   
We're changing homes for the better, one at a time on a dime!

(Mention this ad for a 10% discount on any of our services)

Monday, August 27, 2012

Back to School With Smart Decor & Solutions

Welcome back!  It's been a while since I've been here, something like before the beginning of summer (yes, quite sad, I know), ...but I'm back in full swing ready to take on new challenges and share more than ever before!  I've been working on a few projects that I will be sharing with you over the next month so I'm pretty stoked!  

I thought to myself, what a better way to start than with some fresh ideas, and colour for setting up back to school (as everyone rolls their eyes...), spaces in your home.  It doesn't have to be boring.  Not one bit!  We want our kids to WANT to do homework and study.  Can you imagine?  In fact studies show that certain colours are known to enhance things like attention to detail, remembering words, creativity and being more active. So bring on the colour!  Here's a few pieces I thought were fun and inexpensive...and these are just my ideas-I know you smart cookies will have some great ideas too, which I would love to hear about:)  Get creative and remember to get input from your child themselves and incorporate their specific needs and wants.  Most of all...have fun!


Related Posts Plugin for WordPress, Blogger...